GE washers are reliable, but regular maintenance is key. This guide helps identify and fix common issues, empowering you to resolve problems efficiently and effectively.
Importance of Regular Troubleshooting
Regular troubleshooting is essential for maintaining your GE washer’s performance and longevity. It helps identify issues early, preventing minor problems from escalating into costly repairs. By addressing leaks, unusual noises, or malfunctioning cycles promptly, you can avoid unexpected breakdowns and extend the appliance’s lifespan. Troubleshooting also ensures optimal energy efficiency and cleaning performance, saving you time and money. Additionally, it enhances safety by preventing potential hazards like water damage or electrical issues. Regular checks empower you to maintain your washer proactively, ensuring it runs smoothly and reliably for years to come. Stay vigilant and resolve issues before they disrupt your daily routine.
How to Use This Manual Effectively
This manual is designed to guide you through diagnosing and resolving common issues with your GE washer. Start by identifying the symptom your washer is experiencing, then refer to the relevant section for detailed troubleshooting steps. Use the diagnostic mode explained later to pinpoint problems and interpret error codes. Always check the specific model section for known issues unique to your washer. If a problem persists, consult the “When to Call a Professional” section for guidance. Regular maintenance tips are included to prevent future issues. By following this manual step-by-step, you can efficiently address and resolve most GE washer problems, ensuring optimal performance and longevity.
Common Issues with GE Washers
GE washers may experience leaks, failure to spin, strange noises, or not turning on. These issues often stem from maintenance neglect or worn-out parts over time.
Leaks and Water Damage
Leaks in GE washers often stem from detergent residue, poor drainage, or clogged components. Regularly clean the detergent drawer and gasket to prevent buildup. If leaks occur, inspect the drain pump filter and hoses for blockages. Run a cleaning cycle with a solution or hot water to remove debris. For persistent issues, check for worn-out seals or loose connections. Leaving the door open after cycles can also help prevent moisture buildup. Addressing leaks promptly is crucial to avoid water damage and mold growth. If the problem persists, consider professional assistance to identify hidden defects, especially in newer models with known issues.
Washer Not Spinning
If your GE washer isn’t spinning, it could be due to blockages, imbalanced loads, or issues with the lid switch or motor. Check for obstructions in the drain pump filter or hoses. Ensure the washer is properly balanced and the load isn’t overloaded. If the lid switch is faulty, the washer may refuse to spin for safety reasons. In some cases, the motor or belt might need professional attention. Running a diagnostic cycle or resetting the washer can sometimes resolve the issue. Always refer to your manual for specific instructions, as procedures may vary by model.
- Check for blockages in the drain system.
- Ensure the load is balanced and not overloaded.
- Inspect the lid switch for proper function.
- Consider running a diagnostic or reset cycle.
Strange Noises
Strange noises from your GE washer can indicate issues like loose parts, an unbalanced load, or internal component problems. If you hear clunking, grinding, or rattling sounds, check for loose objects in the drum or an uneven load. A thumping noise may signal an unbalanced washer, requiring adjustment of the leveling feet. Grinding sounds could point to worn-out bearings or a malfunctioning motor. Regular maintenance, such as cleaning the interior and checking for blockages, can prevent these issues. If noises persist, entering diagnostic mode can help identify the root cause. Addressing these problems early can prevent further damage and extend your washer’s lifespan.
Washer Not Turning On
If your GE washer won’t turn on, start by checking the power supply. Ensure the washer is properly plugged in and the outlet is functioning. Verify that the child lock feature is not activated, as this can prevent the washer from starting. Check your home’s circuit breaker or fuse box to ensure no breakers have tripped or fuses blown. If the issue persists, enter diagnostic mode to identify error codes, which can provide clues about the problem. For newer models, diagnostic mode can be accessed by pressing specific buttons, such as the “Delay Start” and “Spin” buttons simultaneously for a few seconds. This step can help you pinpoint whether the issue is electrical, mechanical, or related to the control panel.
Excessive Vibration
Excessive vibration in GE washers can be caused by an uneven load, an unbalanced machine, or worn-out parts. To address this, ensure the washer is level by adjusting its legs. Check for loose components and tighten them if necessary. If the issue persists, inspect the shocks, springs, or tub bearings for damage. Running a balance cycle or redistributing the laundry load can also help. Excessive vibration not only damages the washer but also increases wear and tear on internal parts. Regular maintenance and proper installation are key to preventing this issue. Always refer to your manual for specific guidance on balancing and leveling your GE washer.
Diagnostic Mode Explained
Diagnostic mode helps identify issues by displaying error codes. It’s a built-in feature that assists in troubleshooting problems like non-spinning or noise, ensuring effective repairs.
Entering Diagnostic Mode
To enter diagnostic mode on your GE washer, press and hold the Signal and Delay buttons simultaneously for 3-5 seconds. Release the buttons and immediately press the Start button. The washer will display diagnostic codes or flash error lights. For newer models with a binary display, the process may vary slightly but typically involves a similar button sequence. Once in diagnostic mode, the washer will display stored error codes or perform a series of tests to identify issues. This mode is essential for troubleshooting specific problems and ensuring accurate repairs. Always refer to your manual for model-specific instructions.
Interpreting Diagnostic Mode Readings
Once in diagnostic mode, your GE washer displays error codes or signals through flashes or numbers. These codes indicate specific issues, such as sensor malfunctions or drainage problems. Refer to your manual or online resources to match codes with their meanings. For example, a blinking light pattern may signify a faulty lid switch, while a numeric code could point to a drain pump issue. After identifying the problem, follow the recommended repair steps. If unsure, resetting the washer by unplugging it for 30 minutes can often clear minor glitches. Accurate interpretation ensures effective troubleshooting and prevents further damage to your appliance.
Understanding Error Codes
GE washers display error codes to indicate specific issues. Understanding these codes helps diagnose problems quickly. Always reference the manual or GE’s official resources for accurate solutions.

Common Error Codes and Their Meanings
GE washers display error codes to help diagnose issues. Codes like E1 or E2 indicate specific problems, such as water supply or drainage issues. Understanding these codes is crucial for quick fixes. For example, E1 often signals low water pressure, while E2 may point to a clogged drain pump. Refer to your manual for a full list of codes and their meanings. Some codes, like PF, indicate power failures, while others, such as tE, relate to temperature issues. Resetting codes usually involves unplugging the washer or pressing specific buttons. Always address the root cause to prevent recurring problems and ensure optimal performance.
How to Reset Error Codes
To reset error codes on your GE washer, start by unplugging the machine from the power source. Wait for 30 seconds to allow the system to reset. Plug it back in and run a short cycle to test if the error has cleared. If the issue persists, enter diagnostic mode by pressing specific buttons (usually Signal, Delay Start, and Signal again). Follow the on-screen instructions to identify and clear the error. If the code remains, consult your user manual or contact a professional for further assistance. Regular resets can help maintain your washer’s performance and prevent recurring issues.

Maintenance Tips for GE Washers
Regular cleaning of the interior and detergent drawer prevents mold. Check for leaks, leave the door open post-cycle, and run cleaning cycles to maintain optimal performance.
Cleaning the Washer Interior
Regular cleaning of your GE washer’s interior is essential to prevent odors and mold. Start by spraying and wiping the inside, focusing on the detergent drawer. Fill the drawer with a cleaning solution and run a cleaning cycle or the hottest, longest wash cycle if your model lacks a cleaning function. After the cycle, leave the door open to dry. This process helps eliminate residue and freshens the washer. For persistent issues, repeat the process monthly. Always check for buildup in the detergent drawer and gasket areas to ensure optimal performance and hygiene.
Checking and Replacing Parts
Regularly inspecting and replacing worn-out parts is crucial for maintaining your GE washer’s performance. Common parts to check include door seals, hoses, and belts. Look for signs of wear, cracks, or leaks. Replace any damaged components promptly to prevent further issues. For instance, a faulty door seal can cause leaks, while a worn belt may lead to vibration or spinning problems. Always use genuine GE replacement parts to ensure compatibility and reliability. Additionally, check the drain pump filter and impeller for blockages or damage. If unsure, consult your user manual or contact a professional for assistance. Regular part checks can extend your washer’s lifespan and prevent costly repairs.
- Inspect door seals and hoses for cracks or leaks.
- Replace worn belts or pulleys to avoid vibration issues.
- Check the drain pump for blockages or damage.
- Use genuine GE parts for optimal performance.
By addressing part replacements early, you can maintain your washer’s efficiency and avoid major breakdowns.
Preventing Odors and Mold
Regular maintenance is crucial to prevent odors and mold in your GE washer. Always leave the door open after a cycle to allow the interior to dry. Clean the detergent drawer and gasket frequently, as residue and moisture can harbor mold. Run a cleaning cycle with a washer cleaner or vinegar monthly to eliminate bacteria and odors. Check for blockages in the drain pump filter and ensure proper ventilation in the laundry area. These practices help maintain a fresh, hygienic environment and prevent mold growth, keeping your washer efficient and odor-free over time.
Troubleshooting Specific GE Washer Models
Front-load and top-load GE washers have unique issues. Identify model-specific problems like leaks or noise, and apply targeted solutions for optimal performance and longevity.
Front Load vs. Top Load Differences
Front load and top load GE washers have distinct designs, affecting troubleshooting approaches. Front load models often require more attention to door seals and detergent drawers to prevent mold and odors. They also tend to have more complex mechanisms, leading to issues like leaks or failure to spin. Top load washers, while generally simpler, may experience problems with excessive vibration or imbalanced loads. Understanding these differences is crucial for effective troubleshooting, as repair methods vary significantly between the two designs. Regular maintenance, such as cleaning gaskets and checking balance, can prevent common issues unique to each type.
Known Issues with Specific Models
Certain GE washer models experience unique challenges. For instance, newer front-load models may fail to turn on due to electrical issues. Some top-load models have detergent drawer malfunctions, causing poor cleaning performance. Additionally, specific models like the GE GTW750CSNWW often face problems with spin cycles, while others, like the GE GFW450SSMWW, may produce excessive noise. These issues vary by model and design, but many can be resolved with proper troubleshooting. Regular maintenance and timely repairs are essential to extend the lifespan of your GE washer. This manual provides tailored solutions for these common model-specific problems, helping you address them effectively.

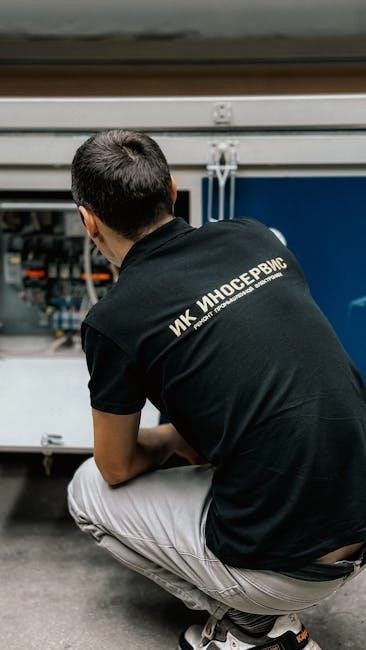
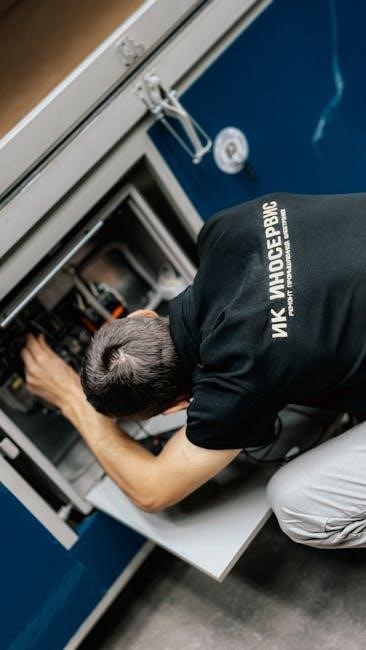
When to Call a Professional
If issues persist after troubleshooting or involve complex repairs, consult a certified technician to ensure safety and proper resolution of the problem.
Signs You Need Expert Help

If your GE washer issue persists after troubleshooting, it’s time to call a professional. Signs include persistent error codes, severe leaks, or the washer not functioning at all. If you notice significant damage, like cracked tubs or electrical issues, expert help is crucial. Strange noises that indicate internal damage or if the washer won’t start despite power also warrant professional attention. Don’t risk safety or further damage—contact a certified technician for complex repairs. They can diagnose and fix issues efficiently, ensuring your washer operates safely and effectively. Delaying expert help can lead to costlier repairs, so act promptly if problems are severe or beyond your DIY capabilities.
Tips for Hiring a Reliable Technician
When hiring a technician for your GE washer, ensure they are certified and experienced with GE appliances. Check online reviews and ask for references to verify reliability. Request a detailed quote upfront and inquire about their experience with similar models; Look for technicians who offer warranties on their repairs. Additionally, ensure they are insured to protect against accidental damage. Don’t hesitate to ask questions about their diagnostic process and the parts they use. A trustworthy technician will provide clear explanations and prioritize your appliance’s longevity. By doing your research, you can ensure your GE washer is in capable hands.
Troubleshooting your GE washer effectively ensures optimal performance and extends its lifespan. By addressing issues like leaks, noise, or error codes promptly, you can prevent costly repairs. Regular maintenance, such as cleaning the interior and checking parts, is essential for preventing odors and mold. If problems persist, don’t hesitate to seek professional help. This manual provides a comprehensive guide to diagnosing and resolving common issues, empowering you to keep your washer running smoothly. Remember, timely intervention and proper care are key to maintaining your appliance’s efficiency and reliability over time.