Oticon TV Adapter 3.0 Manual: A Comprehensive Guide
This guide details the Oticon TV Adapter 3.0’s setup, features, troubleshooting, and care, ensuring optimal use with Oticon hearing aids and compatible devices.
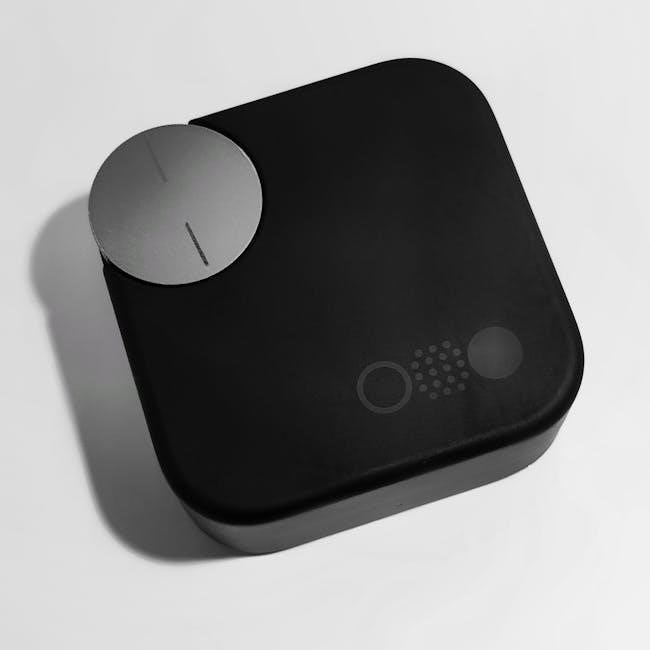
The Oticon TV Adapter 3.0 is a wireless device designed to stream audio directly to your Oticon hearing aids, enhancing your television viewing experience. It’s intended for use with Oticon ConnectClip or Streamer Pro, alongside compatible Oticon wireless hearing aids.

This adapter eliminates the need for cumbersome headphones or relying on your TV’s speakers, providing personalized sound directly to your ears. It connects to your TV via optical or HDMI ARC, offering versatile compatibility with modern television setups. The adapter allows for independent volume control, separate from the TV’s volume, ensuring a comfortable listening level.
This manual provides comprehensive instructions for setup, operation, and troubleshooting, helping you maximize the benefits of your Oticon TV Adapter 3.0.
What’s Included in the Box
Upon opening your Oticon TV Adapter 3.0 package, you should find the following components. Firstly, the TV Adapter 3.0 unit itself, the core of the system. Included is a power supply, essential for operation, and an optical audio cable for connecting to compatible TVs.
Additionally, you’ll receive a USB cable, primarily for firmware updates and potential service needs. Importantly, the ConnectClip or Streamer Pro, required for transmitting audio to your hearing aids, is not included and must be purchased separately. Finally, the box contains this Instructions for Use manual, guiding you through setup and operation.
Please verify all components are present and undamaged before proceeding.
System Requirements & Compatibility
To utilize the Oticon TV Adapter 3.0 effectively, certain system requirements must be met. Your television needs either an optical digital audio output or an HDMI ARC (Audio Return Channel) port. Compatibility extends to most modern TVs, but older models may lack the necessary connections.
Crucially, the adapter requires either an Oticon ConnectClip or Oticon Streamer Pro to transmit audio wirelessly to your Oticon hearing aids. These are sold separately. Ensure your Oticon hearing aids are a compatible wireless model. The adapter supports Dolby Digital and Stereo audio formats.
Sonos Playbar compatibility requires specific TV audio settings, like Dolby Digital or Stereo.

Setting Up Your Oticon TV Adapter 3.0
Proper setup involves connecting the adapter to your TV via optical or HDMI ARC, then pairing it with your Oticon hearing aids or a ConnectClip/Streamer Pro.
Connecting to Your TV
Establishing a connection between the Oticon TV Adapter 3.0 and your television is the crucial first step. You have two primary options: utilizing an optical cable or employing an HDMI ARC (Audio Return Channel) connection.
The optical cable provides a digital audio signal, while HDMI ARC offers both audio and control capabilities. Ensure your TV’s audio settings are configured to output sound via the selected connection type – either Dolby Digital or Stereo.
Refer to your TV’s manual for specific instructions on adjusting these settings. A successful connection is indicated by the adapter’s LED lights, as detailed in the manual on page 8.
Optical Cable Connection
To connect via optical cable, locate the optical output port on your TV. This port is typically labeled “Optical Digital Audio Out” or similar. Connect one end of the optical cable to this port and the other end to the “Optical In” port on the Oticon TV Adapter 3.0.
Within your TV’s audio settings, select “Optical” or “Digital Audio Out” as the audio output source. Ensure the volume on both your TV and the adapter are at appropriate levels.
If no sound is heard, double-check the cable connections and TV audio settings. The adapter should illuminate indicating a successful connection.
HDMI ARC Connection
For HDMI ARC (Audio Return Channel) connection, use an HDMI cable to connect the HDMI ARC port on your TV to the HDMI ARC port on the Oticon TV Adapter 3.0. Ensure your TV supports HDMI ARC functionality and it is enabled within the TV’s settings.
Select “HDMI ARC” as the audio output source in your TV’s audio settings. This allows audio to be sent back from the TV to the adapter through the same HDMI cable. Verify the PLAYBAR is working correctly alongside the Oticon adapter.
If experiencing issues, consult your TV’s manual for specific ARC setup instructions.
Pairing with Oticon Hearing Aids
To connect your Oticon hearing aids to the TV Adapter 3.0, ensure the adapter is powered on and in pairing mode. The pairing process varies slightly depending on whether you’re using an Oticon ConnectClip or Oticon Streamer Pro.
The adapter is intended for use with Oticon wireless hearing aids. Follow the instructions in your hearing aid’s user guide to initiate pairing. The adapter will automatically search for and connect to your hearing aids once they are in pairing mode. Successful pairing is indicated by a change in the adapter’s LED indicator.
Pairing with Oticon ConnectClip
When using the Oticon ConnectClip, ensure it’s fully charged and paired with your hearing aids first. Then, with the TV Adapter 3.0 powered on, activate pairing mode on the ConnectClip by pressing and holding the pairing button. The ConnectClip will then connect to the adapter automatically.
A successful connection is confirmed by an audible tone in your hearing aids and a change in the ConnectClip’s LED indicator. The ConnectClip acts as a bridge, transmitting audio from the TV Adapter to your Oticon hearing aids, providing a clear and direct audio stream.
Pairing with Oticon Streamer Pro
To pair the Oticon TV Adapter 3.0 with your Streamer Pro, first ensure your hearing aids are connected to the Streamer. Activate pairing mode on the Streamer Pro by pressing and holding the multi-button until the indicator light flashes blue. Simultaneously, put the TV Adapter 3.0 into pairing mode.
The devices will automatically establish a connection, indicated by a solid blue light on the Streamer Pro and a corresponding change on the TV Adapter. This pairing allows direct streaming of TV audio to your Oticon hearing aids via the Streamer Pro, offering a convenient listening experience.
Understanding the Adapter’s Features
Explore the TV Adapter 3.0’s functionalities, including LED indicators, volume adjustments, and the ability to connect multiple Oticon hearing aids simultaneously for personalized audio.
LED Indicator Lights & Their Meanings
The Oticon TV Adapter 3.0 utilizes LED indicator lights to communicate its status. A solid blue light signifies a stable connection with your hearing aids. A blinking blue light indicates the adapter is searching for a connection, or is in pairing mode.
A solid red light suggests a potential issue, such as no audio signal from the TV. A blinking red light may indicate a connection problem or a software error. Refer to the full manual for detailed troubleshooting steps if a red light persists. Understanding these indicators allows for quick identification of any operational issues, ensuring a seamless listening experience with your Oticon hearing aids.
Volume Control & Adjustment
The Oticon TV Adapter 3.0 allows for convenient volume control directly through your Oticon hearing aids. You can adjust the sound level using the volume controls on your hearing aids themselves, rather than relying on the TV’s remote.
This provides a personalized listening experience. The adapter doesn’t have dedicated volume buttons; all adjustments are made via your hearing aids. Ensure your hearing aids are properly paired with the adapter for this functionality to work correctly. Fine-tune the volume to your preference for optimal clarity and comfort, enjoying a tailored audio experience.
Multiple Hearing Aid Connection
The Oticon TV Adapter 3.0 supports simultaneous connection to two Oticon hearing aids. This feature allows both wearers to enjoy the direct sound stream from the TV without needing separate adapters. Pairing both hearing aids ensures a synchronized audio experience for a shared listening environment.
Ensure both hearing aids are in pairing mode when connecting to the adapter. The adapter will automatically recognize and connect to both devices, providing a stereo sound experience. This is ideal for couples or family members who both use Oticon hearing aids and want to enjoy TV audio together.
Troubleshooting Common Issues
This section addresses frequent problems like no sound, pairing difficulties, and sound quality concerns, offering solutions to restore optimal performance of your adapter.
No Sound from TV Adapter
If you experience no sound from the TV Adapter 3.0, begin by verifying the TV’s audio settings. Ensure it’s configured to output either Dolby Digital or Stereo, as these are compatible formats.
Next, check the LED indicator lights on the adapter itself; page 8 of the manual provides a detailed explanation of their meanings. Confirm the optical or HDMI ARC cable is securely connected to both the TV and the adapter.
Also, verify that your PLAYBAR (if applicable) is functioning correctly while the TV is playing. If the PLAYBAR works but the Oticon adapter doesn’t, the issue likely lies within the adapter or pairing process. Finally, double-check the volume levels on both the TV and your hearing aids.
Pairing Problems
Experiencing difficulty pairing your Oticon hearing aids with the TV Adapter 3.0? First, ensure compatibility with Oticon ConnectClip or Streamer Pro, as these are required intermediaries. Confirm your hearing aids are in pairing mode – consult your hearing aid’s manual for specific instructions.
Verify the adapter is within a reasonable range of your hearing aids during the pairing process. If pairing repeatedly fails, try resetting the adapter by briefly disconnecting and reconnecting its power source.
Ensure no other Bluetooth devices are interfering with the connection. Refer to the Oticon manual for detailed pairing steps and troubleshooting guidance, specifically addressing connection issues.
Interference & Sound Quality Issues
If you encounter interference or poor sound quality, several factors could be at play. Check for potential sources of Bluetooth interference, such as other wireless devices or physical obstructions between the adapter and your hearing aids.
Ensure the TV’s audio output settings are correctly configured – select either Dolby Digital or Stereo, depending on your setup and hearing aid capabilities. Experiment with different audio source selections (Optical vs. HDMI ARC) to determine if one provides a clearer signal.
Consult the manual for guidance on optimizing audio settings and minimizing interference.
Advanced Settings & Customization
Fine-tune your listening experience by adjusting audio delay and selecting the optimal audio source – Optical or HDMI ARC – for personalized sound.
Adjusting Audio Delay
Experiencing a noticeable lag between the TV picture and sound? The Oticon TV Adapter 3.0 allows for audio delay adjustments to synchronize the audio with the video. This feature is crucial when the TV processes sound, creating a slight delay.
To adjust the delay, access the settings through your Oticon hearing aid app (Oticon ON). Navigate to the TV Adapter settings and locate the audio delay option. You can then incrementally increase or decrease the delay in milliseconds until the audio and video are perfectly aligned.
Start with small adjustments and test frequently. A properly adjusted audio delay significantly enhances the viewing experience, making dialogue clear and synchronized with the on-screen action.
Selecting Audio Source (Optical vs. HDMI ARC)
The Oticon TV Adapter 3.0 offers two connection options: Optical and HDMI ARC. Choosing the correct source is vital for optimal audio quality and functionality. HDMI ARC (Audio Return Channel) simplifies connections, transmitting audio from the TV to the adapter via a single HDMI cable.
Optical connections use a dedicated optical cable. If your TV supports HDMI ARC, it’s generally the preferred method due to its convenience and potential for higher audio quality. However, if ARC isn’t available or experiences issues, the optical connection provides a reliable alternative.
Within the Oticon ON app, you can select the active audio source to match your TV connection.

Maintenance & Care
Regular cleaning with a soft, dry cloth ensures optimal performance. Avoid harsh chemicals or liquids, and store the adapter in a cool, dry location.
Cleaning the Adapter
To maintain your Oticon TV Adapter 3.0 in optimal condition, regular cleaning is recommended. Always disconnect the adapter from the power source before cleaning. Use a soft, dry cloth to gently wipe the exterior surfaces, removing any dust or fingerprints.
Avoid using water, cleaning solvents, or abrasive materials, as these can damage the adapter’s finish or internal components. For stubborn marks, lightly dampen the cloth with a mild, soapy water solution – ensuring it is almost dry – and wipe gently.
Pay particular attention to the ports (optical and HDMI), ensuring they are free from debris. Do not insert any objects into the ports. After cleaning, allow the adapter to dry completely before reconnecting it to the power source and your TV.
Storage Guidelines
When not in use, store your Oticon TV Adapter 3.0 in a cool, dry place, away from direct sunlight, extreme temperatures, and humidity. Ideally, keep it in its original packaging or a protective case to prevent dust accumulation and potential damage.
Avoid storing the adapter near strong magnetic fields or sources of interference, as this could affect its performance. Ensure the storage location is free from excessive vibration or physical impact.
Before storing for an extended period, disconnect the adapter from the power source and carefully coil the cables to prevent tangling or strain. Periodically check the adapter during storage to ensure no visible damage has occurred;
Technical Specifications
This section outlines the adapter’s power needs, wireless capabilities, and supported audio formats, providing detailed information for optimal performance and compatibility.
Power Requirements
The Oticon TV Adapter 3.0 operates using a standard power supply, ensuring convenient and reliable operation. It requires a 5V DC power input, typically supplied through a USB connection.
The adapter is designed for use with the provided USB power adapter, or a compatible USB port on your television or a USB wall charger. Using an incompatible power supply may result in suboptimal performance or damage to the device.
Power consumption is relatively low, making it an energy-efficient solution for wireless audio streaming. The adapter does not contain a built-in rechargeable battery; it requires a constant power source to function. Always ensure a secure connection to the power source for uninterrupted audio enjoyment.
Wireless Range
The Oticon TV Adapter 3.0 utilizes Bluetooth technology to transmit audio wirelessly to your Oticon hearing aids or streamer devices. The typical wireless range is up to 33 feet (10 meters) in an open environment, offering flexibility in positioning the adapter and your listening devices.
However, the actual range can be affected by several factors, including physical obstructions like walls and furniture, interference from other wireless devices, and the specific Bluetooth version supported by your hearing aids.
For optimal performance, minimize obstructions between the adapter and your hearing aids. Maintaining a clear line of sight generally maximizes the wireless range and ensures a stable audio connection.
Supported Audio Formats
The Oticon TV Adapter 3.0 is designed to handle a variety of common audio formats, ensuring compatibility with most modern televisions and audio sources. It supports stereo audio, which is standard for many TV programs and music.
Furthermore, the adapter can process Dolby Digital audio when connected via HDMI ARC or optical input. However, it’s important to note that it does not support Dolby Atmos or DTS:X immersive audio formats.
The adapter will downmix these more complex formats to stereo or Dolby Digital for transmission to your Oticon hearing aids, providing a clear and enjoyable listening experience.

Safety Information & Warnings
Always follow basic safety precautions when using the adapter, avoiding water exposure and extreme temperatures to prevent damage or malfunction.
Important Safety Precautions
To ensure safe operation of your Oticon TV Adapter 3.0, please adhere to the following guidelines. Avoid using the device in excessively humid environments or near water sources, as this may cause electrical hazards. Do not attempt to disassemble or repair the adapter yourself; contact qualified personnel for any servicing needs.
Ensure the adapter is placed on a stable surface to prevent it from falling and causing potential damage. Keep the device away from extreme heat or direct sunlight. Regularly inspect the power cord for any signs of damage and replace it if necessary.
Always unplug the adapter before cleaning. This device is intended for indoor use only. Improper use may void the warranty and potentially cause harm. Follow all local regulations regarding the disposal of electronic devices.
Warranty Information
Oticon provides a limited warranty for the TV Adapter 3.0, covering defects in materials and workmanship for a specified period from the date of purchase. This warranty does not cover damage resulting from misuse, accidents, unauthorized repairs, or normal wear and tear.
To make a warranty claim, please contact your authorized Oticon retailer or Oticon customer support, providing proof of purchase and a detailed description of the issue. The warranty may be void if the product has been altered or modified.
Warranty terms and conditions may vary by region. Refer to the separate warranty document included with your adapter for complete details regarding coverage, limitations, and procedures for obtaining service.
Resources & Support
Access the official Oticon website for manuals, FAQs, and support. Additionally, explore the Sonos community forums for user tips and troubleshooting assistance.
Oticon Website & Support
For comprehensive assistance with your Oticon TV Adapter 3.0, the official Oticon website is your primary resource. Here, you’ll find downloadable manuals, including the complete Instructions for Use manual (available on ManualsLib), offering detailed guidance on setup, operation, and maintenance.
The website also hosts a frequently asked questions (FAQ) section addressing common issues and providing quick solutions. You can explore troubleshooting tips for pairing problems, sound quality concerns, and connectivity issues.
Direct support options, such as contact forms and phone numbers for customer service, are readily available. These channels allow you to connect with Oticon professionals for personalized assistance and expert advice regarding your adapter and hearing aid compatibility.
Frequently Asked Questions (FAQ)
Q: Why is there no sound from the TV Adapter? Ensure the TV’s audio output is correctly set to Optical or HDMI ARC, and check the adapter’s LED indicators for status.
Q: I’m having pairing problems. What should I do? Verify your Oticon hearing aids are in pairing mode and are compatible with the adapter; Consult the manual for specific pairing instructions with ConnectClip or Streamer Pro.
Q: How do I address interference or poor sound quality? Check for obstructions between the adapter and hearing aids. Confirm the TV’s audio settings (Dolby Digital or Stereo) are appropriate. Refer to page 8 of the manual for detailed guidance.